I was 16 years old, sitting in shop class, and had just finished counting how many board feet of red oak lumber the teacher had brought. The next task was building something with it. For most students, it was standard shop-class projects – picture frames, cutting boards, and jewelry boxes. For me, it was the spark I needed to start chasing a dream that had been quietly growing in my mind: building a real banjo.
The First Experiment
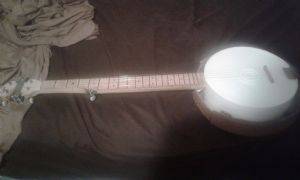
Let me take you back to January of 2018. That’s when my dad and I finished building the “Bucket-Jo.” The idea of making a homemade instrument had intrigued me for a while. I can’t say exactly what lit that initial spark—maybe it was knowing several mandolin and fiddle builders in my area, or perhaps it was the challenge of creating something playable with my own hands. Whatever the reason, the “Bucket-Jo” was my first experiment in the art of luthiery.
As an inexperienced teen, I had no idea how to use many tools necessary to build anything. With a lot of help from my Dad, we were able to build the Bucket-Jo together. The Bucket-Jo is pretty much what it sounds like: a piece of pine lumber shoved through the bottom half of a 5-gallon bucket, a fretboard made from red oak, frets made from nails filed smooth and glued in place, and a cardboard resonator. It was crude banjo—barely playable, in fact—but the principle was there. Oh, the joy when I first strummed the strings! It sounded like a banjo and looked like a banjo, so it was a banjo - no matter how rough. It was far from perfect, with its horrible intonation and strings seemingly an inch off the fretboard, but that was okay! What mattered was the discovery—that even at 15, I could start building something meaningful with my own two hands. More importantly, it gave me the bug for luthier work.
Research and Preparation
After finishing the Bucket-Jo, I spent countless hours researching the world of banjos. I read about banjo construction methods, the instrument’s history, and particularly, the ways Gibson done things through the years. I loved looking up the different model banjos they offered, the differences in the models, how the models changed depending on the year it was built, and so much more. I wasn’t just dreaming anymore; I was learning and preparing for something bigger.
And So It Begins
Fast-forward to September. That shop class was my first real opportunity to put what I had learned into practice. With a stack of red oak and access to tools, I set out to build something much better than the Bucket-Jo. At the time, I thought I was only having fun tinkering around. I didn’t know that project would be the beginning of something I’ve since discovered to be one of many enjoyments in life.
So off to work I went! The red oak the teacher had supplied us with was roughly an inch thick, perhaps a bit more. I noticed it was flatsawn lumber (growth rings run approximately parallel to the ground), which—as I had learned—could cause stability issues for an instrument neck. To fix this, I applied a new technique: rotating the board 90 degrees so the grain aligned vertically (quartersawn). But now the board was only half the width needed for a banjo neck, and that’s no good!
I sawed the board into pieces about 3 inches wide and 32 inches long, rotated them to the quartersawn orientation, and glued them together, forming a sturdy piece about 2 to 2.25 inches wide and 3 inches thick. Perfect for a neck blank!
The only problem at this point was the width of the headstock, which was planned to be 3 to 3.5” wide. But never to fear! I cut some more red oak to about 6 inches long and 3 inches wide, glued them to each side of the neck blank on one end, and voila! The neck blank was now ready to be sawn into shape!
Looking Like A Banjo
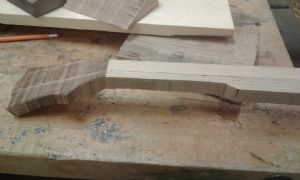
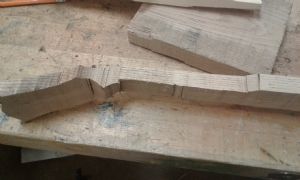
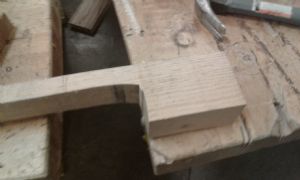
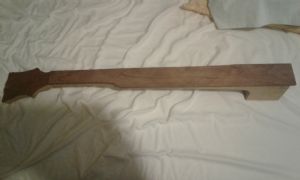
The next day we worked on this project, I took the blank to the bandsaw and began to work on creating the rough shape of a banjo neck. I cut the headstock to a roughly 15-degree angle, left enough room to shape a nice hand stop at the base of the headstock, thinned the middle of the blank to the rough thickness of a neck, and left the end thicker for the heel. With the side profile completed, I then turned the neck over and began working on the front profile. I cut the sides of the neck off to make the rough shape of a banjo fretboard—especially the signature “5th string bump”—and took care to make sure the cuts surrounding the headstock were nearly perpendicular to the fretboard surface—just like I’d learned many banjo headstocks are.
I knew truss rods were typically used in banjo neck construction, but with limited money, a truss rod wasn’t an option. Therefore, I opted to leave it alone and go ahead and make a fretboard.
Although fretboards are typically made from harder woods, once again, I did not have that option. Instead, I found a piece of walnut in the shop and used it as a fretboard. I made plans on borrowing a fret saw from a friend to saw slots in the board after it was on the neck, so I went ahead and cut my walnut fretboard to shape and glued it onto the neck. To match the fretboard, I also glued a thin piece of walnut to the face of the headstock.
Final Refinements and Lessons Learned
At this point, the basic structure was complete, though the neck still awaited its final refinement. As many projects go at this stage, there were some seemingly minor flaws that, once the neck was complete, would likely disappear. Therefore, I began shaping the neck using drawknives, files, and sanding blocks to arrive at my final product. To my dismay, the flaws that I had hoped would disappear finally presented themselves as permanent scars in the project.
The red oak neck now sits on a shelf in my workshop, a reminder of where I started. This was just the beginning, however. Little did I know that much more was to come. Every project, no matter how flawed, teaches something valuable. If you’re dreaming about building instruments, don’t wait. Start small, make mistakes, and embrace every lesson along the way.

1 comment
Loved your first blog. I can’t wait till your next entry is published.